What syncing is (and why a slate made it easy)
Syncing means placing every camera's clips so that what happened at the same time shows up at the same time on the timeline. A slate gives you a shared point: a clap that every camera sees and hears. Without one, you have to find that shared point elsewhere: in the sound, in a gesture, in the timecode or in the time each clip was recorded.
The tools Premiere gives you
Premiere has two places to sync, both documented in Adobe's official help:
- Clip > Create Multi-Camera Source Sequence. It syncs by In points, Out points, timecode, audio or clip markers (Adobe help).
- Clip > Synchronize, with the clips already on the timeline. It syncs by clip start, clip end, timecode, clip marker or an audio channel (Adobe help).
One detail of the multicam sequence worth knowing: unless you tick Create Single Multicam Source Sequence, Premiere only combines clips that overlap in time, and clips that don't overlap with any other are left out. On a long day with gaps between takes, it's easy to lose clips without noticing.
Four ways to sync without a slate
1. By audio
Premiere compares the cameras' sound and lines the clips up where it matches. It's the most common option without a slate, and it works very well when every camera recorded the same sound: an interview, a speech, a song.
It fails when there's no shared sound: a drone with no useful audio, a camera far away, a GoPro in a housing, or a shot with loud music in one place and silence in another. And the clips have to overlap: two takes that don't coincide in time have nothing to compare.
2. With a manual marker
You find a moment every camera saw (a photo flash, a clap, someone shutting a door), add a marker with the same name to each clip and sync by marker. It's exact, but it's clip-by-clip manual work: with hundreds of clips it doesn't scale.
3. By timecode
If every camera records the same timecode, Premiere lines them up on its own, even with no shared sound. The catch is that every camera needs timecode, synced before recording. Phones, GoPros, drones and most stills cameras people actually use don't meet that.
4. By recording time
Almost every camera stores the recording date and time inside each file. With that, each clip can go to its time without a slate, without timecode and even without shared sound. That's what Ingest Pro does: it reads that time, puts each camera on its own track and, if you ask it to, fine-tunes by audio to the frame the few seconds that clocks are always off by.
| Audio | Marker | Timecode | Recording time | |
|---|---|---|---|---|
| Needs shared sound | Yes | No | No | No (only for fine-tuning) |
| Camera prep | No | No | Yes, sync timecode | Set the clocks |
| Manual work | Little | A lot | Little | Little |
| Drones, GoPros, phones | If they share sound | Yes | Rarely | Yes |
What to use when
- A few cameras with shared sound (an interview, a podcast): Premiere's audio sync is usually enough.
- Synced timecode on every camera: timecode, no question.
- Long days, lots of different cameras or clips without sound (weddings, events, trips): recording time, with audio fine-tuning on top.
Doing it automatically with Ingest Pro
The fourth way, by recording time, is the one Ingest Pro automates. This is how you use it.
What you need
- The clips from every camera copied into one folder (mixed or in subfolders, it doesn't matter).
- Premiere Pro 25.6 or later on Windows 10 or 11, or DaVinci Resolve if you use the desktop app.
- Ingest Pro: the Premiere plugin or the desktop app.
Option 1: inside Premiere, with the plugin
The most direct way: the timeline is built in the project you already have open, with nothing to import or export.
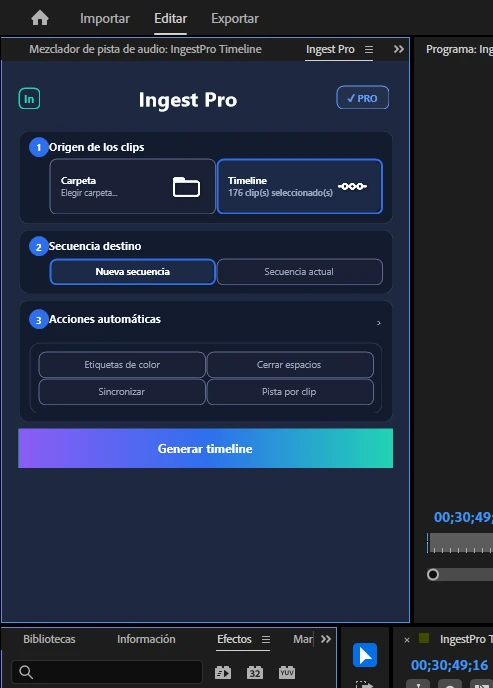
- Import the clips from every camera into your Premiere project.
- Open the Ingest Pro panel from Premiere's Window menu.
- Pick the options: audio sync, close gaps and colour labels per camera.
- Press the button. Ingest Pro reads each clip's time, puts each camera on its own track and places everything in order.
The plugin comes with 14 days with everything, no card, and after that it stays free with up to 2 cameras per timeline.
Option 2: with the desktop app (Premiere or DaVinci)
If you edit in DaVinci Resolve, or would rather not install anything in Premiere, the desktop app does the same from outside: it analyses the folder and hands you an XML file with the day already built, which you open in your editor.
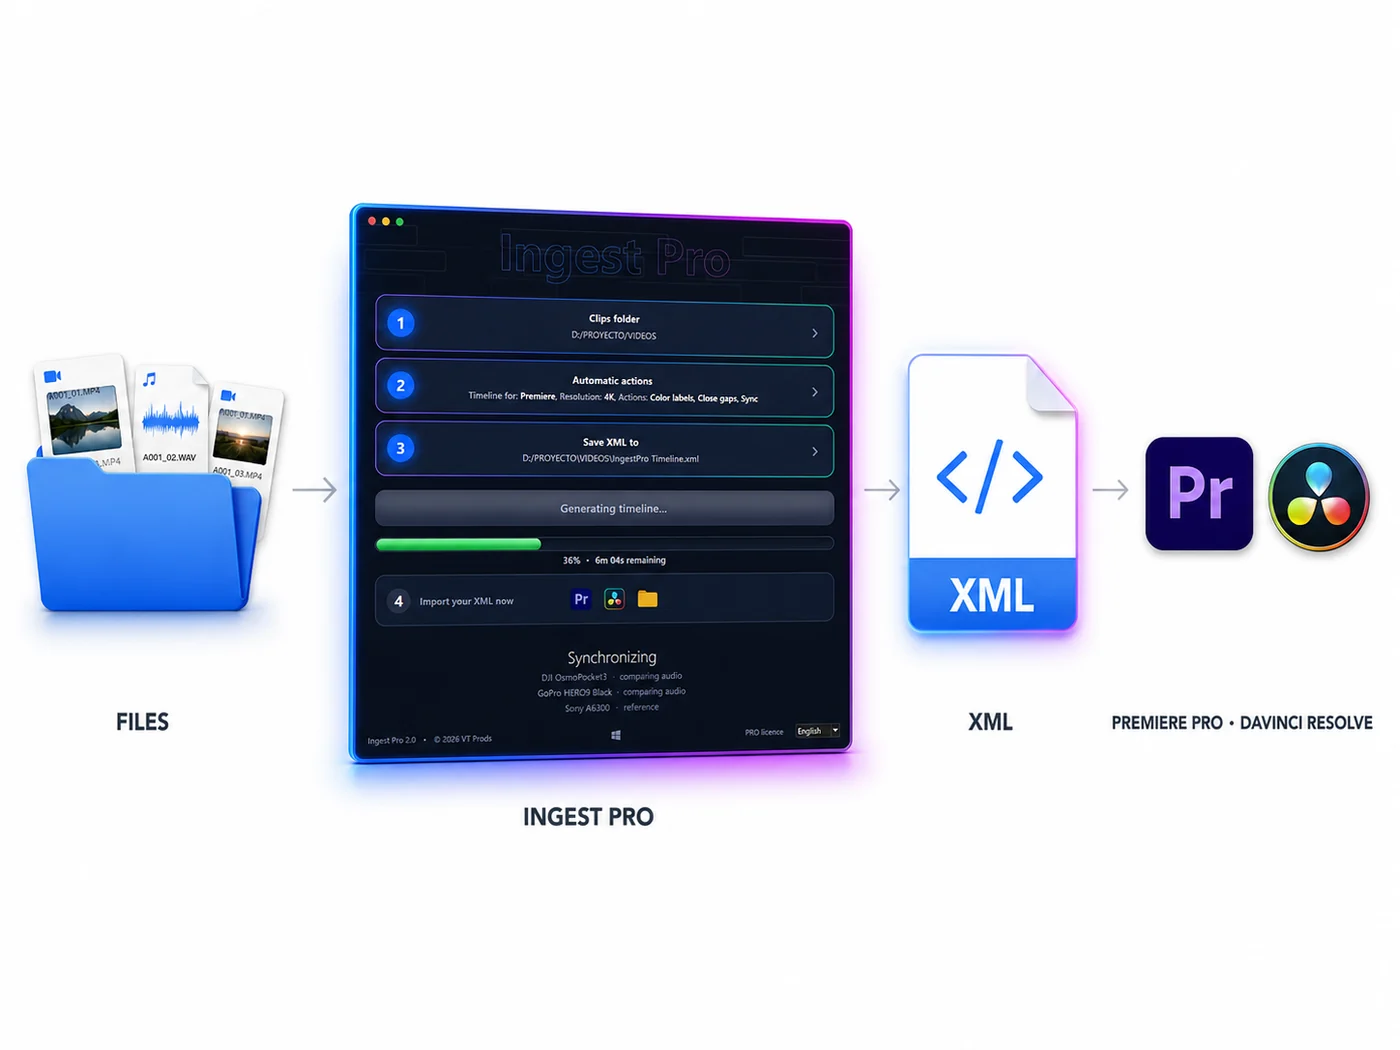
- Choose the folder with the clips.
- Tick the automatic actions and whether the XML is for Premiere or DaVinci.
- Generate the timeline and import the XML into your editor.
The app comes with a 14-day full trial, no card.
Before and after
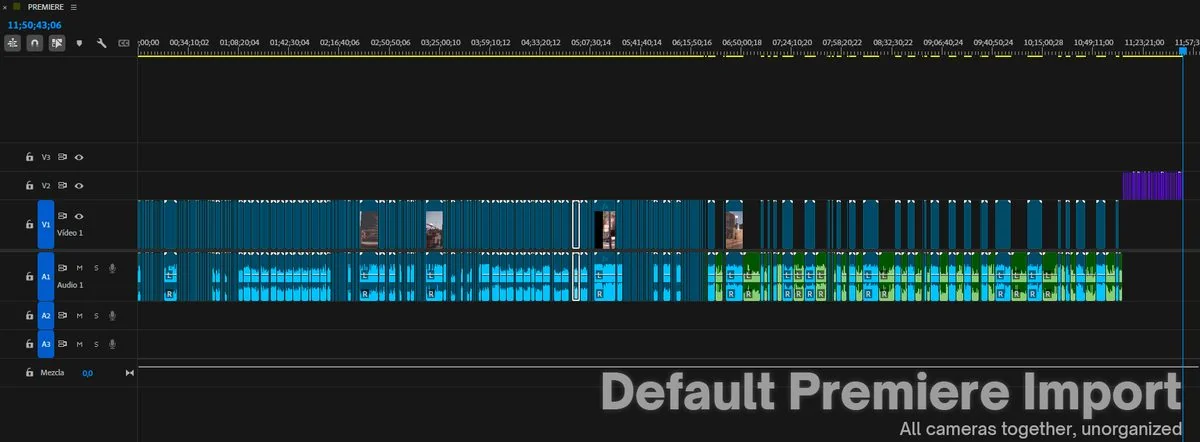
Before: the clips, as they come.
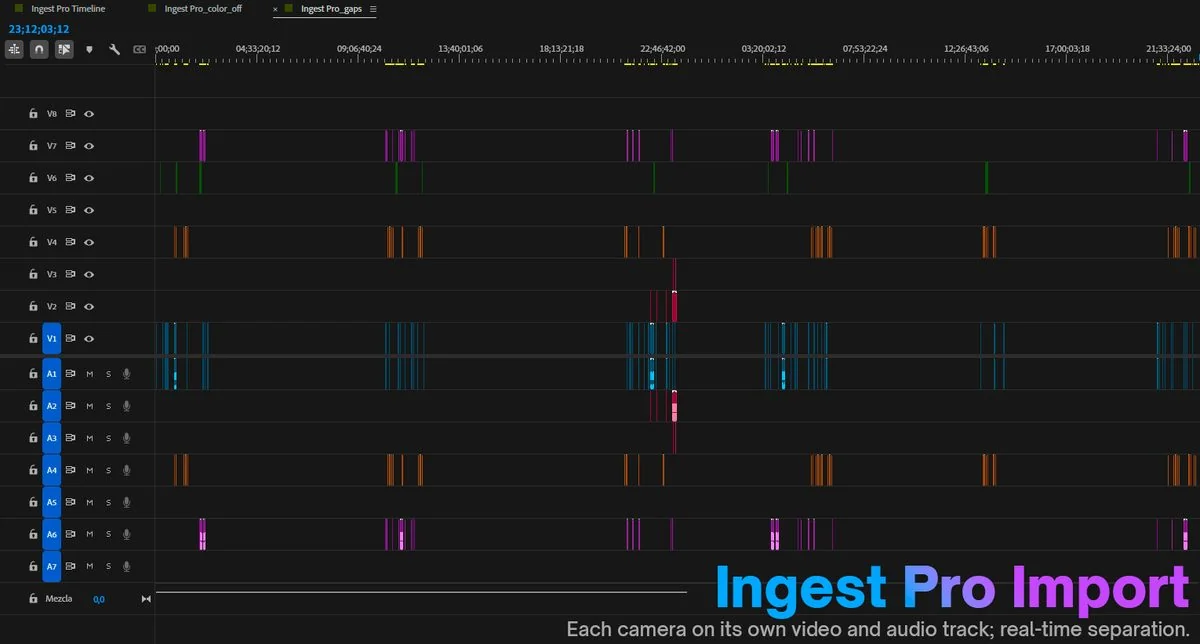
After: each camera on its track and each clip at its time.
Three tips to save yourself the pain
- Set every camera's clock before shooting. It's what shows the most. If you already shot with the wrong time, Clock Fix Pro fixes it in batches. More in why your camera's clock ruins your edit.
- Let every camera hear something in common now and then, even without a slate: a clap at the start already gives you a sync point.
- Check for stray clips. After syncing, look for clips left out or at an odd time before you start cutting.
- Close the gaps. Remove the stretches where no camera is recording (lunch, travel) without throwing anything out of sync.